Posts Tagged ‘Ultralite’

Brake Bias Issues

Friday, February 3rd, 2012

The only major dynamics complaint I had about my Ultralite was the rear lockup issue under hard braking. The car comes with a very nice set of Wilwood brakes (front and rear) with separate master cylinders for the the front and rear so it definitely wasn’t a component quality problem.

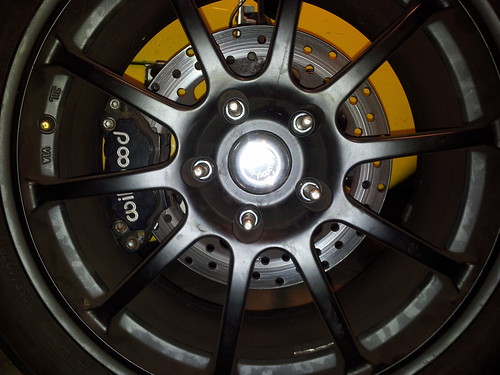
The issue I was having is that under hard braking at autocross the rears would immediately lock up and cause a lot of oversteer. This was even worse at the track where braking at the end of straights would lock the rears well before the fronts leading to bad porpoising at the rear. The whole issue was being caused by having equal braking capability front to rear which meant that once the weight transferred forward under braking, the rear wheels had very little weight on them and were prone to locking up while the fronts were still spinning. You could avoid this by braking earlier but this would mean that the front brakes would not be used to their full ability and would lead to longer stopping distances. The real solution would be to move the brake bias forward which I first attempted to do using the balance bar in the pedal box/master cylinder setup. This made no noticeable difference to the brake bias which meant that the bias issue was worse that I suspected.

Step two was to install an inline proportioning valve(below) on the rear circuit which could reduce the rear line pressure by up to 57%. While this did make the autocross situation much better I still had the problem of rear porpoising at the track albeit much better than before.

After consulting with some of the folks on the various forums I came up with two options: 1) replace the brake caliper with a smaller caliper and 2) replace the rear master cylinder with a larger piston. Since the piston was significantly cheaper than getting 2 brake calipers I decided to replace the MC with a 7/8th inch piston (originally 3/4 inch) which has been a great solution so far and has allowed me to run a much more balanced car at the track.

If you are building a car from scratch I would recommend going for a smaller set of calipers in the rear and/or smaller brake rotors both of which will save you some unsprung weight as well. I believe that the later Ultralite owners went to using stock 12-inch Subaru rotors in the rear which sounds like an economical solution as well. If you have a car with the original setup I can say that this solution of larger MC and bias valve has worked well for me.

“Diff”icult times

Thursday, February 2nd, 2012

After 18 months of procrastinating about updating the blog about the Ultralite I figure its time to start putting pen to paper (or fingers to keyboard). Regular followers of the blog may remember that my Buttonwillow adventure ended with the Ultralite being flatbedded home as it looked like on of the two bolts holding the diff in place had backed out and gas tank prevented me from doing a roadside fix. I was thus still quite happy on the truck ride home as I thought it would be an easy fix and I should be back on the road soon – little did I know that I was in for some “diff”icult times.

can picture
The first thing to do was to empty the fuel tank and then remove it. As you might see from the residue above, the gas cap had been weeping fuel for a while and I figured that this was a good time to replace the gasket around the filler and see if that would fix the problem. I stuck my hand into the empty tank to see what size spanner I would need to remove the nuts on the cap fitting when I was shocked to discover that the cap ring was attached using just sheet metal screws with no nuts or backing plate inside the tank. While I could probably have fixed the issue fairly easily, I figured I had ridden my luck hard enough by tracking such a shoddy fuel setup and decided to go with a proper fuel cell instead. I gave Fuel Safe a call and they were able to create a custom bladder that fit inside my existing tank. Not only was the new custom cell much safer than the original setup but it has a proper racing collector which meant that I could ditch my external surge tank setup and save some weight. If you are looking for a custom fuel cell I highly recommend Drew Barney at Fuel Safe who was the guy I dealt with to create the setup below.

Fuel Safe Fuel Cell

While my tank was at a Fuel Safe, I got busy actually fixing the diff mounts. Removing the gas tank had shown that the bolt had not backed out and instead had snapped from the torque. After removing the bolt and drilling out the snapped section in the unit I found that both rear bolts were metric grade 8.8 which sounds fine but actually equates to SAE grade 5 which is not what you want for something load bearing like this. I swapped both the bolts with metric 10.9 grade (equiv SAE grade 8) hardware and refitted the fuel cell thinking I should be good to go. However as soon as I backed out of the garage I heard the clunk from the drive train which meant that things were still not ok.

20100821_002.jpg

Pulling the center console off the shifter area showed the second problem (above). The front mounting point was created by welding a single mount onto a cut down version of the differential member assembly from a Subaru legacy. This mount was attached to some very thin metal and had basically ripped itself loose from the member assembly. After speaking to other Ultralite owner I found that this was a common failure point and needed to be reinforced for track cars in particular. I thus had a thick steel plate welded to the existing assembly to moth create a new mount point and also spread the load more widely on the Subaru part (see below).

reinforced diff front mount

Talking to the other owner also brought out that the diff bolts breaking was a common occurance and that many owners had created a brace that attached to the frame and helped spread the engine torque loads beyond the two diff bolts. Rob at Dietschwerks created this brace for me that had been on my car for over a year now and has been through several track days with no issues.

If you are an Ultralite owner I recommend that you check that you diff bolts are metric 10.9 grade and also create a diff brace for your car to avoid the painful debugging process that I went through.

Setting Up a Seven – When things just work

Tuesday, October 19th, 2010

I have made a long list of modifications to the Seven since my last blog update which I still need to document on here. In the meantime I wanted to share this video from the GGLC autocross on Saturday (watch in fullscreen).

The Seven may be unreliable, impractical and difficult to live with but the few days like this when everything works are absolutely worth the hassle. Incidentally we found the reason for the surging idle it ended up that I couldn’t drive the car for the rest of the day :-)

Setting up a Seven – Wheels and Tires

Friday, April 16th, 2010

My new WCM Ultralite S2K

When I initially purchased the Ultralite it was running on a set of generic 7.5″ wide alloys with 235-width Falken Azeni RT-615 tires all around(above). While the Azenis are decent tires (we use them on the Lemons car), they are still street tires and just cannot cope with the absurd power of the seven. After having a few moments of wheelspin in 3rd gear, I decided that while long slides are fun, I did want to go to more grippy setup as well as increase the rear grip level to give the car some better balance.

I quickly learned that one of the more annoying things about having a kit car is the extreme amount of pain you have to go through to get a set of wheels. While most kit cars use off the shelf components from production cars for their hubs, they generally also use parts off different cars front to rear and have very different offsets anyway. In the case of the Ultralite it uses 5×100 bolt pattern with with the most common wheel sizes being a 17×8 fronts (offset 35-38) and 17×9/10 rear (45×48 offset). Now the unfortunate part is that while the specifications themselves are fairly common (Subaru WRX), I could not find a single large scale wheel maker that makes both sizes (8″ and 10 “) in the same wheel design. I should also add that 99% of the online sites out there only allow you to sear for wheels by car model and not by wheel specs which made the tire search extremely frustrating.

The only viable option that I found were the Team Dynamics Pro Race 1.2 wheels that are used by a few other Ultralite owners out there. They are an afforable option and by all accounts stand up well to regular track use. Unfortunately because they are a fairly small operation out of England, the US importers have quite a limited stock of wheels which meant that I would have to special order the wheels and that could take anywhere from 2-6 months to get here.

At this point I happened to take my wheels off only to find that one of the wheel studs on the left front wheel was loose. I gently unscrewed the stud by hand only to find a large amount of aluminium shavings in the stud threads. It appeared that at some point in the past, a previous owner waaaay overtightened the lug nuts on the wheel and literally stripped the stud out of the hub. Additionally a couple of the studs were at a slight angle from horizontal which along with the stripping meant that the hub damage was too extensive to repair.

I contacted Brian Andersen at World Class Motorsports to get a part number for the hub only to find that the hub was actually a custom part that WCM modified before they put it on the car. They took a stock Wilwood Pinto hub with an existing 5×114 and 5×120 bolt pattern and machined a set of 5×100 pattern holes to which they added the wheel studs. This was probably done such that the bolt pattern on the front wheels would match the stock Subaru 5×100 pattern on the rear hubs. Unfortunately this also meant that if I bought a new hub I would would have to find someone to custom drill the new pattern into place for me. At this point I had the sudden brainwave that since the existing hub was mechanically sound (only the 5×100 stud openings were damaged) and still had other bolt patterns, I could just switch to a different bolt pattern and keep using the same hub. Luckily I had delayed placing an order for the Team Dynamics wheels which meant that I could just buy the front wheels with new bolt pattern without any wheel fitment issues. I went ahead and got a couple of multi-drilled rotor hats (existing ones were 5×100 only) with some ARP studs and quickly changed the front wheels to a 5×114 bolt pattern which allowed me to reuse the existing hubs and gave me access to a wider selection of front wheel options.

At this point I decided that I could not wait the 2-6 months for the Team Dynamics wheels and instead began investigating other wheel options. I came across the Wheeldude.com folks who had a good selection of Rota wheels and had the added benefit of being local (Fremont). While looking through their website I found that while they did not have any one line of wheels that would fit both my front and rear wheel requirements, they did have a number of different wheel lines that looked similar enough that you wouldn’t really notice the difference. After going through several different options, I decided that setup of G-force fronts and DPT rears would likely be my best bet. I then went over to their warehouse and got to see a couple of the actual wheels and compare them side-by-side before picking a set of 5×114 17×8 G-forces for the front and dual drilled 5×100/114 17×9 DPTs for the rear ($750 for the full set). An additional benefit of getting the DPTs for the rear is that I can in future move to the upgraded WRX STI rear end (5×114 hubs) and continue using the same wheel set.

The next step was to figure out the tires to use and it was a pretty easy decision to go for an R-compound tire. Sure I would have no grip in the rain or in sub-zero conditions but the chances of encountering either condition in a roofless, door-less, windshield-less car in California are pretty low :) . Additionally I had been using Toyo RA-1 tires on my Elise for the last year and was very impressed with not only their grip but also how they do not have any heat-cycling issues (important on a lightweight car like the Seven). Unfortunately Toyo has discontinued making the RA-1 and though they are planning to restart production for 2010 there were no estimate for when the tires would actually reach dealers.

Since my preferred option was not available I had to decide between the Yoko AO48, Nitto NT01 and the Toyo R888s. Both the AO48 and the R888 tires are pretty common in the Elise community and from all the feedback I was hearing they appear to be good tires with a high peak grip but are prone to getting greasy after several laps and also heat cycle before they run out of tread depth. The RA-1s in comparison have a slightly lower peak grip but instead will maintain the same level of grip after several laps and can be used all the way to the cords without any heat cycling out. Since I will only be using the Seven for recreational driving and non-competition events, peak grip isn’t an issue and with the light weight (1300 lbs), heat cycling resistance is much more important than tire wear. Looking further into the Nitto NT01 option, I was surprised to find that Nitto was actually a subsidiary of Toyo and the NT01 apparently uses the same rubber compound as the discontinued RA1. A little more investigation showed that Discount Tire Direct would sell me a a set of 4 tires for ~$725 shipped which also made them the cheapest option by far :D

So in the end after about 2 months of searching and modifying the bolt pattern I ended up with 235/40ZR-17 Nitto NT01s on 17×8 Rota G-Forces up front with 275/40ZR-17 Nitto NT01s on 17×9 Rota DPTs on the back. As you can see from the pictures below, the wheels actually match quite well and people don’t realize that they are different front to rear until I explicitly point it out.

So far I have only used the car for street events and one truncated track day at Laguna Seca but even in this short span I have to say that the wheel combo is very well balanced and it now takes some intentional provacation before the rear wheels start spinning. In terms of absolute grip I was able to easily pull 1.2 G at Laguna despite having a lot suspension issues and not pushing very hard. Once I get the setup sorted out and start really pushing the car I expect that the G meter will be reading quite a bit higher. I should also add that I have been running the tires at about 15 psi hot all around which seems to work pretty well. Tire pressure only goes up by about 2-3 psi during a track session which may not sound like much on a regular car but its a 20% increase when you start at such low pressures.

Setting up a Seven – The Ultralite Experience

Tuesday, March 30th, 2010

My new WCM Ultralite S2K

As many of you know I purchased a Lotus Seven replica called the WCM Ultralite S2K late last year to make it a street legal track toy. While the Ultralite may maintain the spirit of the original Seven, as you can see below, it has a distinctly different shape and has generally larger dimensions to accommodate drivers of all sizes. In order to move this extra bulk (relatively speaking) around it comes with the incredible F20C engine out of the Honda S2000. The end product has some astonishing performance figures:

Weight: 1300 lbs
Horsepower: 240 bhp
Redline: 9000 rpm
Power to weight ratio: 400+ hp/ton
0-60 mph: 3.5 seconds

With the (more) original predecessor

My particular car was the first prototype built by World Class Motorsports and is the actual car used in most of the magazine tests. The original owner of the car then sold it to an active PCA member who took fantastic care of the car and documented his changes. He also had the car made street legal under the California SB100 exemption for kit cars. After a few years he ended up selling it and the car went through 2 other owners before I found out that it was on sale again and jumped at the chance.

The previous owner of the Ultralite going through the corkscrew

The first and most immediate thing that hits you when driving the Ultralite is sheer mind-blowing acceleration. When I bought the car it was on a set of fairly old 235 width Falken Azenis. Now while the Azenins are actually pretty good tires for autocross, they have nowhere near enough grip for the ridiculous horsepower of the Ultralite. The very first time I tried a hard acceleration run I spun the rear wheels in 3rd gear and got a full on fishtail moment at 60+ mph. This is the only car I have driven where you have to rev match on upshifts or the rear wheels will happily lose traction :D Even within the same gear the acceleration is phenomenal. The car pulls pretty strongly below 6k rpm but once you go above the 6k threshold the VTEC cuts in an it feels like someone has hit the fast forward button. Plus with the 9k redline you have plenty of time in the powerband and dont have to keep rowing the gears. Also despite the fearsome power, I do have to say that the Ultralite is actually a very benign handling car. The rear gives you plenty of notice before it steps out and you can easily use the throttle to play with oversteer through the bends (see opposite lock below :) ).

Driving the Seven is very visceral experience where you can see, feel and hear every mechanical thing on the car. While you are “one with the road” it is a very different experience than what you feel in a Lotus Elise. The Elise is delicate, nimble car and will eagerly follow your every command while the Ultralite is like a raging bull that you have to manhandle into position before you step on the throttle and hold on for dear life. It is very much of a “mans car” where the controls are very heavy and you end up smelling of oil and gasoline after every drive. :)

Offroad Seven

While the car was in running, registered and mostly-drivable condition when I bought it, I nonetheless had several improvements in mind before it would be truly track worthy. While this car is likely to be a project car for the rest of my life, for the more immediate future I plan on a series of “Setting up a Seven” blog posts about work I have already done including the safety setup, wheels/tires, exhaust, suspension, etc… In the meantime enjoy this video of Rob doing a run at the last Lotus Club autocross of the 2009 season.


video by cxcheng