Archive for October, 2007

Got Video?

Tuesday, October 23rd, 2007

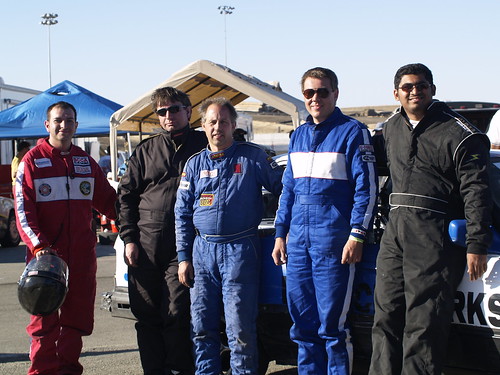
Question: Which Lemons team was using the same technology as Formula 1 teams?
Answer: Team SFF1 was using the same ChaseCam setup used by Formula 1 teams like Renault and Red Bull.

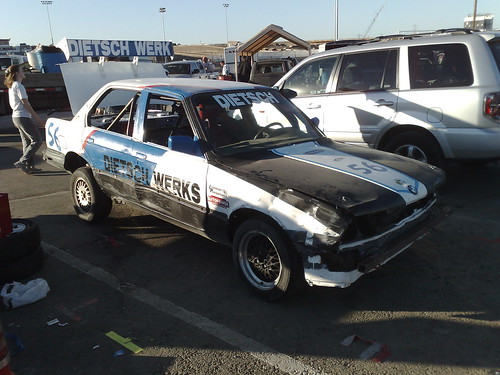
As I’ve said before, the ChaseCam PDR100 Racer Kit is my dream in-car video setup – a solid state video recorder with a lightweight, shockproof, weatherproof camera. When we decided to run the 24 Hours of Lemons I approached ChaseCam to see if they might be interested in lending us a video setup to record the race. I am glad to report that they were very interested in the race and sent us a two full recording setups (PDR 100, bulletcam and camera mount) so that we’d be able to record both forward and backward views.

Camera Setup

PDR100 setup

We mounted the cameras to the rollcage and velcroed the PDR units to the area where the back seats used to be. To avoid having to change batteries every stint, we directly hard wired the units to a 12V line from the dashboard. Once the cameras were aimed all we had to do was pop in a couple of 8GB video cards and we were ready to go. We are still sifting through the recorded video but here is a quick teaser from our rear facing camera. Jyri was driving the car when he gets hit while going through the esses. He recovers well from the hit but a few seconds later he gets hit again while going through the right handed sweeper and goes into the tirewall. Incidentally the blue CRX that passes us in the beginning of the video is Team Blue Goose, a team of EliseTalkers from Texas who finished 8th.


Ouch from rnair on Vimeo.

At its highest quality setting, the PDR100 records MPEG-2 at the rate of 4GB an hour. This meant that at every pitstop we had to switch CF cards and download the card data onto a laptop. The only issue we ran into was that the maximum file size on the PDR is 4GB (irrespective of card size) which means that in high quality mode you can only record 1 hour of video. If you are going to be recording video of greater length I suggest you reduce the quality to “normal”. Now if you’ll excuse me I have some 50 GB of super high quality video to sift through.

P.S.: I am in the process of writing up our entry for the December race so it will probably be a week or so before I recap the race and post the video online.

Update from Randy Chase: “The largest single file size is 4gigs but it can record continuously using consecutive 4gig files. For example, a 16gig card will record 4 hours of the highest quality video, but in 4 files. A 32gig card will record 8 hours. The gap between files is less than 1/2 second.” The PDR100 is now officially perfect.

  • Share/Bookmark

The race is over

Monday, October 22nd, 2007

The veteran

Tired (but happy) drivers

We finished 44th out of 85 cars (full results). Our pace was really good but we lost a lot of time (3+ hours) due to some mechanical issues. I’ll be writing up more detail of how the race went and our band-aid mechanical fixes over the next few days. In the meantime here is some video of the race start.


Race start from rnair on Vimeo.

  • Share/Bookmark

Test day

Saturday, October 20th, 2007

Yesterday we had a pretty good test day at Altamont. All of us did a few laps behind the wheel to get a feel for the car and the track. The car ran very fast and we all did 54 sec laps with Jyri doing a best of 52. We did have some tire wear issues with our right front tire due to the long banked turns – we will be doing some emergency camber adjustments to the front to fix that.

Here is a photo of me passing someone on the outside of the banking and a video of Jyri doing some quick laps under lights.


Hot laps from rnair on Vimeo.

  • Share/Bookmark

Seat Time

Friday, October 19th, 2007

One of the most expensive parts of the Lemons car is the seat – a good fiberglass seat will run you at least $500 dollars and even an aluminium seat will cost > $300. Now if you are preping a regular race car thats not a problem, the seat will usually last the lifetime of the car. In our case the car will most probably last only 1 race and it did not make too much sense to spend more than the cost of the car on just one seat. Enter Terry Griffin and Griffin Motorwerke, the west coast Recaro distributor, who offered to lend us a Pole Position seat and the associated mounting hardware.

Griffin Motorwerke

One of the biggest advantages of getting the Recaro hardware was the fact that it came with a set of sliders. Since our driver lineup has some significant height variation, a single fixed seat position really wouldn’t have worked for us. By using a seat on sliders we’d be able to move the seat around as needed to fit the various drivers. I should add that it is possible to transport a seat in the Elise.

Recaro Seat

When we got around to actually mounting the seat in the car we came across some interesting problems. Mounting points for the Recaro Seat rails are 16 inches apart while the factory mounting points are 17 inches apart. Since we couldn’t reuse the factory seat points we’d have to drill some holes in the floor except that with just an inch of clearance it wouldn’t be very safe to drill a hole next to the factory point. Also the floor on the E30 is not flat which meant that we couldn’t get a good fit between the rails and the floor. In the end we had to weld some C-channel to the floor and mount the seat rails to the channel. This method did lose us about half an inch in head-room but it was the only safe way of mounting the seat.

Once the seat was in place we came across another problem – the Pole Position seat was actually a bit too small for both Jyri and me. The shoulder harness slots were a too low and the tops of the slots were under our shoulder. In the case of an accident this would lead to spinal compression which really isn’t a very good idea. We got back in touch with Terry and he gave us a Profi SPG XL seat instead. This seat is quite a bit bigger and the shoulder holes are high enough to work quite well for all of us. Best of all since it’s a Recaro seat it just slots into the same brackets as the Pole Position and required no modifications to car. Our race seat was officially in place.

14102007728.jpg

I’d like to give a huge thanks to Terry Griffin and Griffin Motorwerke for sponsoring our team in the Lemons race. I’ll let you into a little know fact about Terry- apart from running his massively successful business, he also lead a double life as a professional F1 photographer. He takes some incredible photographs and as a long time member of the F1 circus he knows a good number of players. The next time you’re at his shop just bring up the topic of F1 and expect to spend a good half hour discussing the sport with a true insider

  • Share/Bookmark

Days 4 and 5 – Its all about the cage

Tuesday, October 9th, 2007

One of the most important pieces of safety equipment for any racecar is the roll cage. Having seen one car flip in July event, we knew that this one part we we had to take very seriously. The official rules for the race only require a 4 point roll bar and a door bar, but we decided to go all the way and get a full roll cage instead. In fact, one of the reasons we went with the E30 was availability of several bolt-in roll cages for the spec E30 market. After looking around for a bit and contacting several companies, we decided that an Autopower roll cage was the way to go. Their cages are legal for both SCCA and NASA and they are universally regarded as one of the best cage builders in the business. Additionally since they are one of the largest manufacturers of bolt-in cages, we knew that they cage would be well designed and would bolt in with a minimum of fuss.

The next step was actually buy the cage, Autopower does not sell to directly to clients so we had to find a distributor. When I looked up the list I was happy to see that Livermore Performance was one of their distributors. I have been buying brake pads from Monty and Stephen ever since I moved to California, and its always been a pleasure to work with them. When I spoke to them about our Lemons team they were very interested and signed on to become a sponsor. At this point the race was just a month away, and the regular 4 week lead time for a cage would have been too slow, luckily Livermore Performance and Autopower worked some magic and were able to rush us a cage in just 10 days.

Roll cage instructions

Roll cage

The cage arrived as a set of shaped and welded steel tubes which we painted and left to dry overnight. After that we put the car on the lift at Dietch Werks and got to work fitting in the cage. The back section with the actual roll hoop went in fairly smoothly as did the front windshield bars. The door bars did however cause some interesting issues due to the placement and width of the B-pillar post. The roll cage was designed to fit an E30 coupe since that is the car most commonly used in the Spec E30 class. On a 4 door E30 like ours, the b pillar post is about 8 inches further forward than in the coupe which meant that the main cage roll hoop would not line up with the B pillar. Normally this wouldn’t be an issue (you cant use the back door but that not really a concern in a race car), but since the door bars curve outwards from the roll hoop they were hitting the B-pillar and would not fit in place. The solution was to use a sledgehammer and bend the inner sheetmetal of B-pillar about half an inch outwards. This does affect the structural integrity of the pillar, but since we are doing it to put a full roll cage, the car is going to be considerably stronger than stock.
Before

After - needed to make some space for the door bar

Once the full cage was in place, we drilled holes in the sheet metal and bolted the cage to the car with the included high grade bolts and mounting plates. The final step was to tie the various pieces of the cage using the supplied sleeves which would be bolted across the joints in the cage. This required us to drill a 3/8th inch holes through the sleeve and the cage so we could pass a bolt through. Now this may sound simple but it was actually by far the slowest job. The cage steel is so hard that it takes 10-15 minutes to drill just a single hole and we needed 16 holes in all which meant that it took us a full day just to fit the sleeves. On the plus side though I will feel extremely safe sitting in a car with such a strong cage :-)

Drilling the roll cage mounts

All in all the cage install was a fairly simple process and needed only the most basic tools. It may add weight to the car but in terms of improved safety and chassis rigidity it is one mod that was well worth time, money and effort. If you ever need a roll cage, I strongly recommend buying the Autopower cage from Livermore Performance.

  • Share/Bookmark

Car Prep Day 3 – Its alive

Sunday, October 7th, 2007

Day three of car prep was all about getting the engine running. At this point we had had the car with us for several months but we hadn’t yet heard the damn thing run.

We started up by tightening up the head bolts and putting in a new timing belt. After that we adjusted the valve spacing (space between camshaft and valve stem) and began reconnecting that various fuel hoses and wires. We decided not to put the cooling system in until the engine was in running condition to give ourselves some work room in case we needed to replace any additional parts. After everything was connected back up we added some more oil to the engine and started it for the first time.

It’s Alive from rnair on Vimeo.

After sorting out some initial issues with some blown fuses, the car started on just the second attempt. The cloud of smoke on the side was a combination of an untightened exhaust manifold and some oil burning off. After this major success we decided to wrap up the day and were actually able to drive the car outside to park it. It still doesn’t have a cooling system so we havent run it for any length of time but the fact that it moves under its own power and doesn’t make any weird noises is a great sign.

Baby steps from rnair on Vimeo.

  • Share/Bookmark